

Keeping with the imaginative and descriptive naming conventions for my lamps, I present Lamp 06.
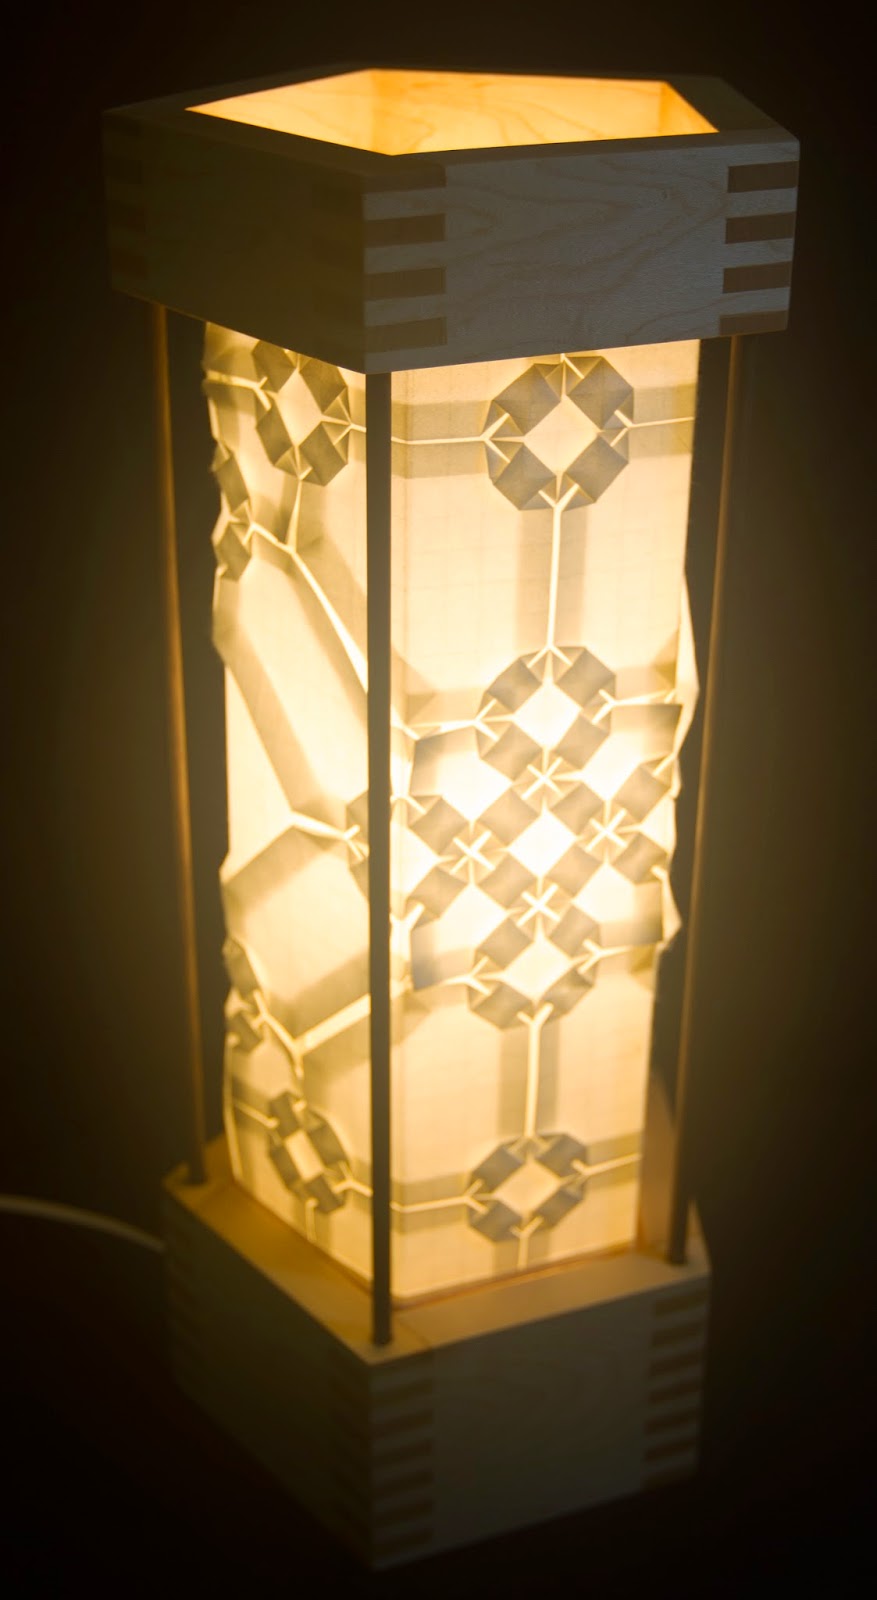
Lamp 06 - Mulberry paper, maple, walnut, tung oil finish. 7x18", 2015.
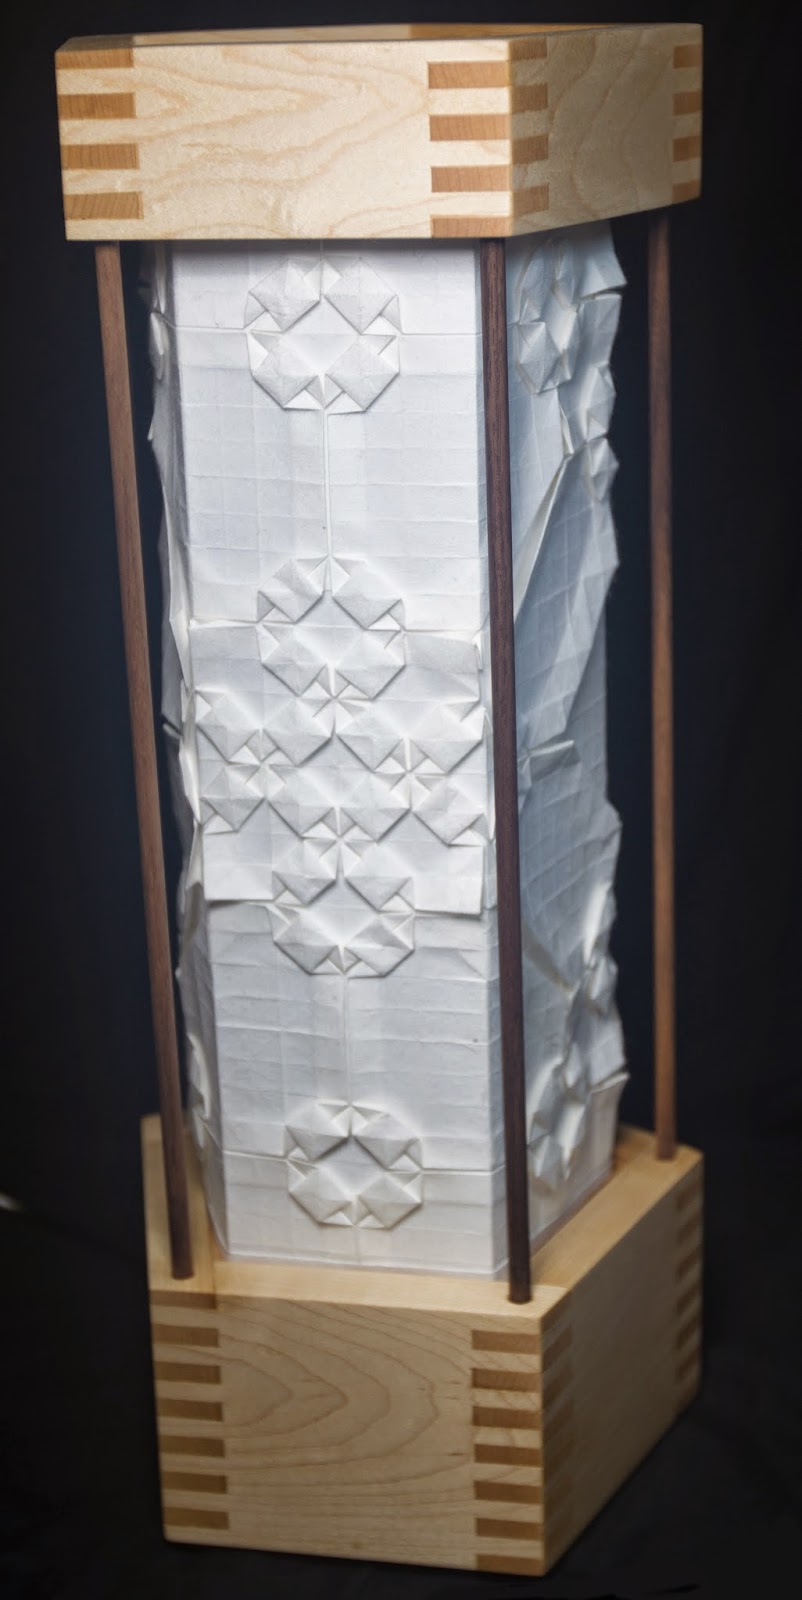
Currently, the walnut dowels are removable so that the pieces can be boxed separately for shipping. I worry that if everything is glued in place, rattling and impacts during shipping may damage the dowels. Still thinking about the problem and there may be changes before I list this lamp for sale.
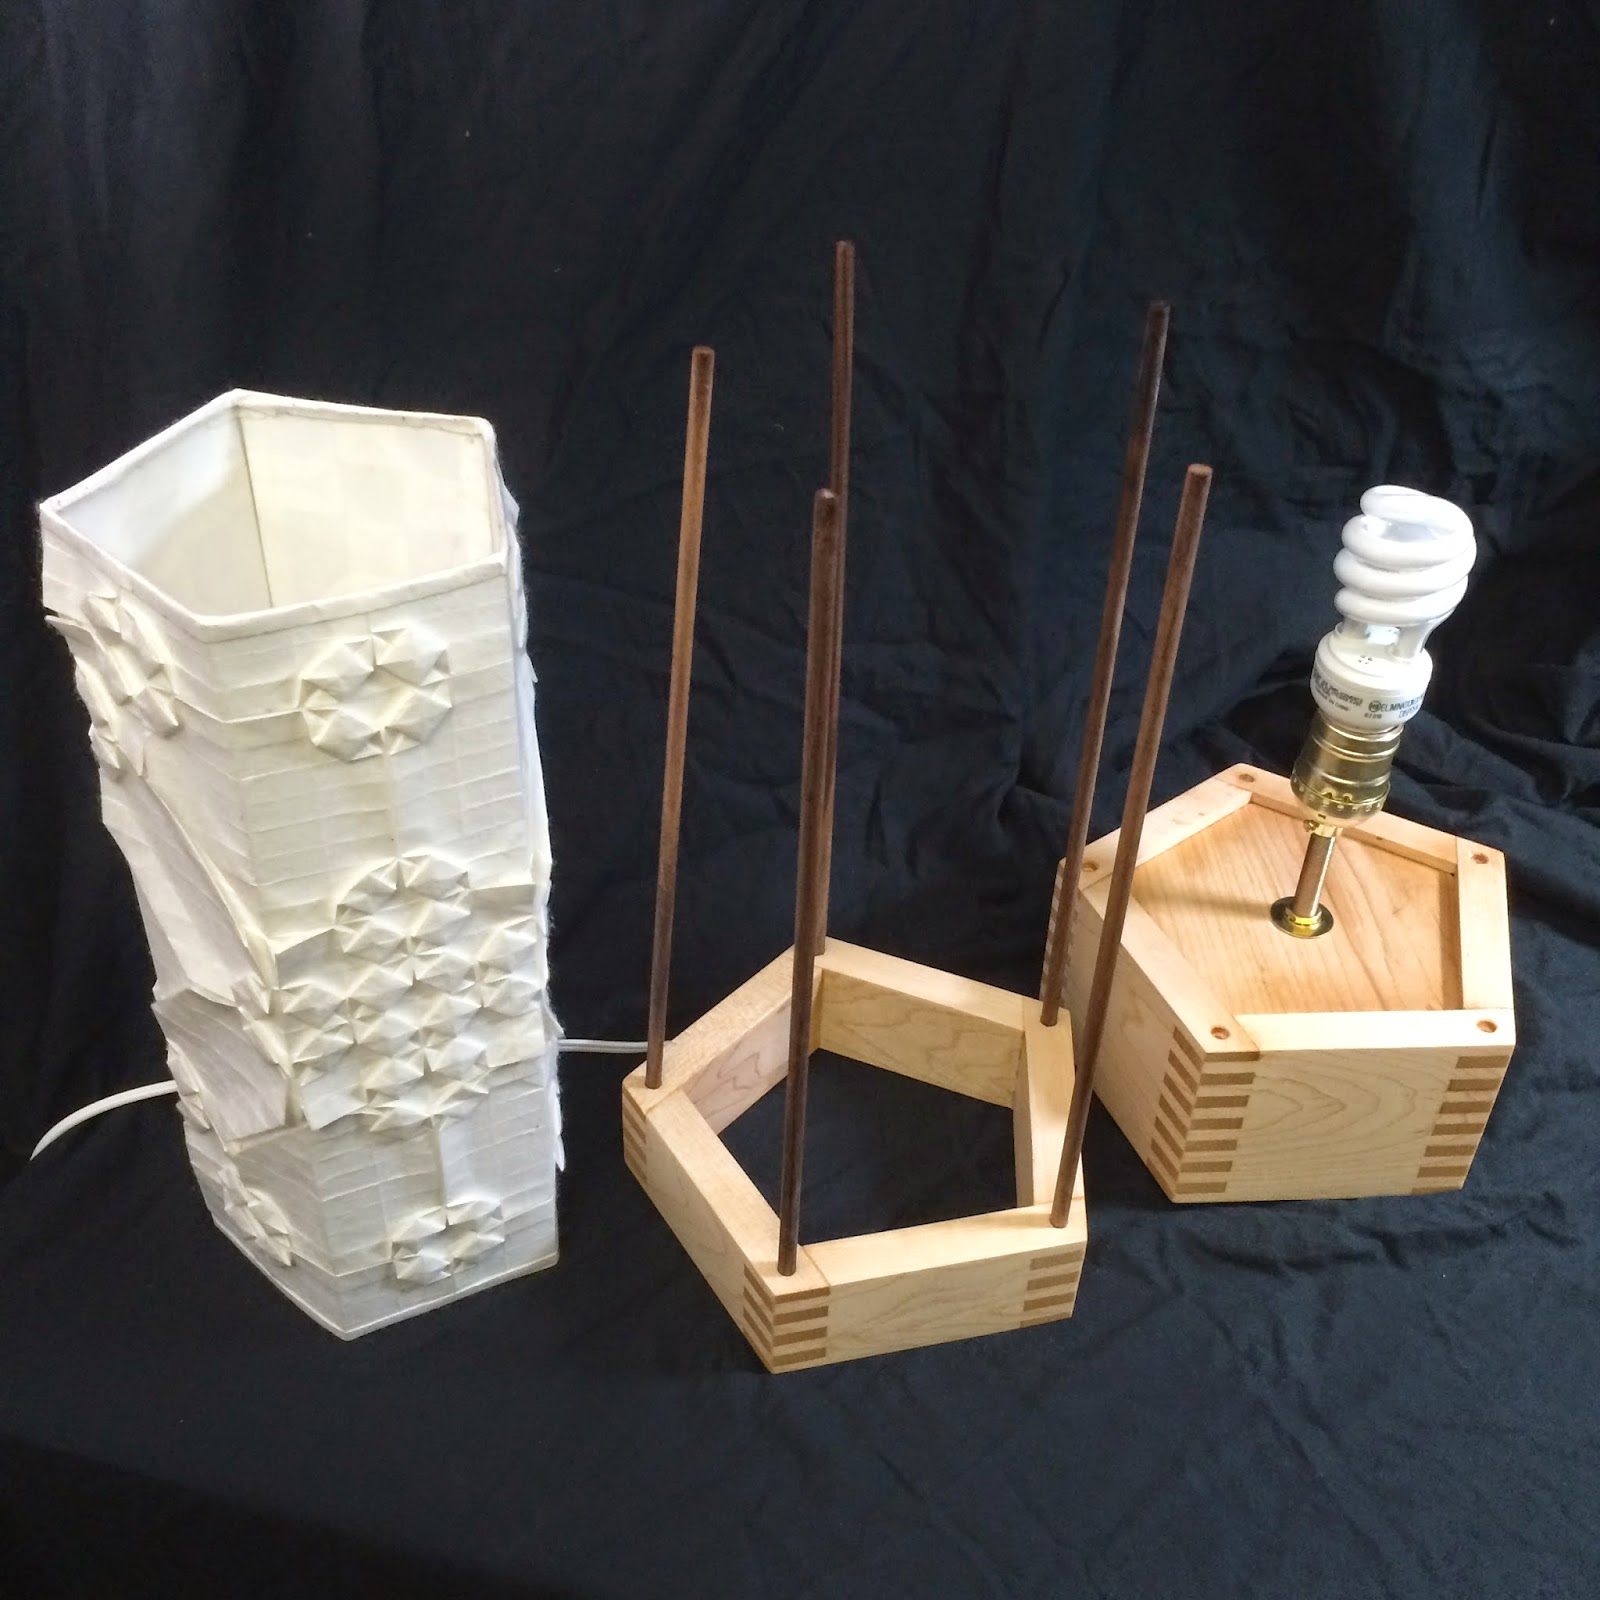
Slightly disassembled (dowels are fully removable).
For those interested in the design and build process, read on!
Last summer I sketched out an initial design for a pentagonal lamp with box joint joinery.
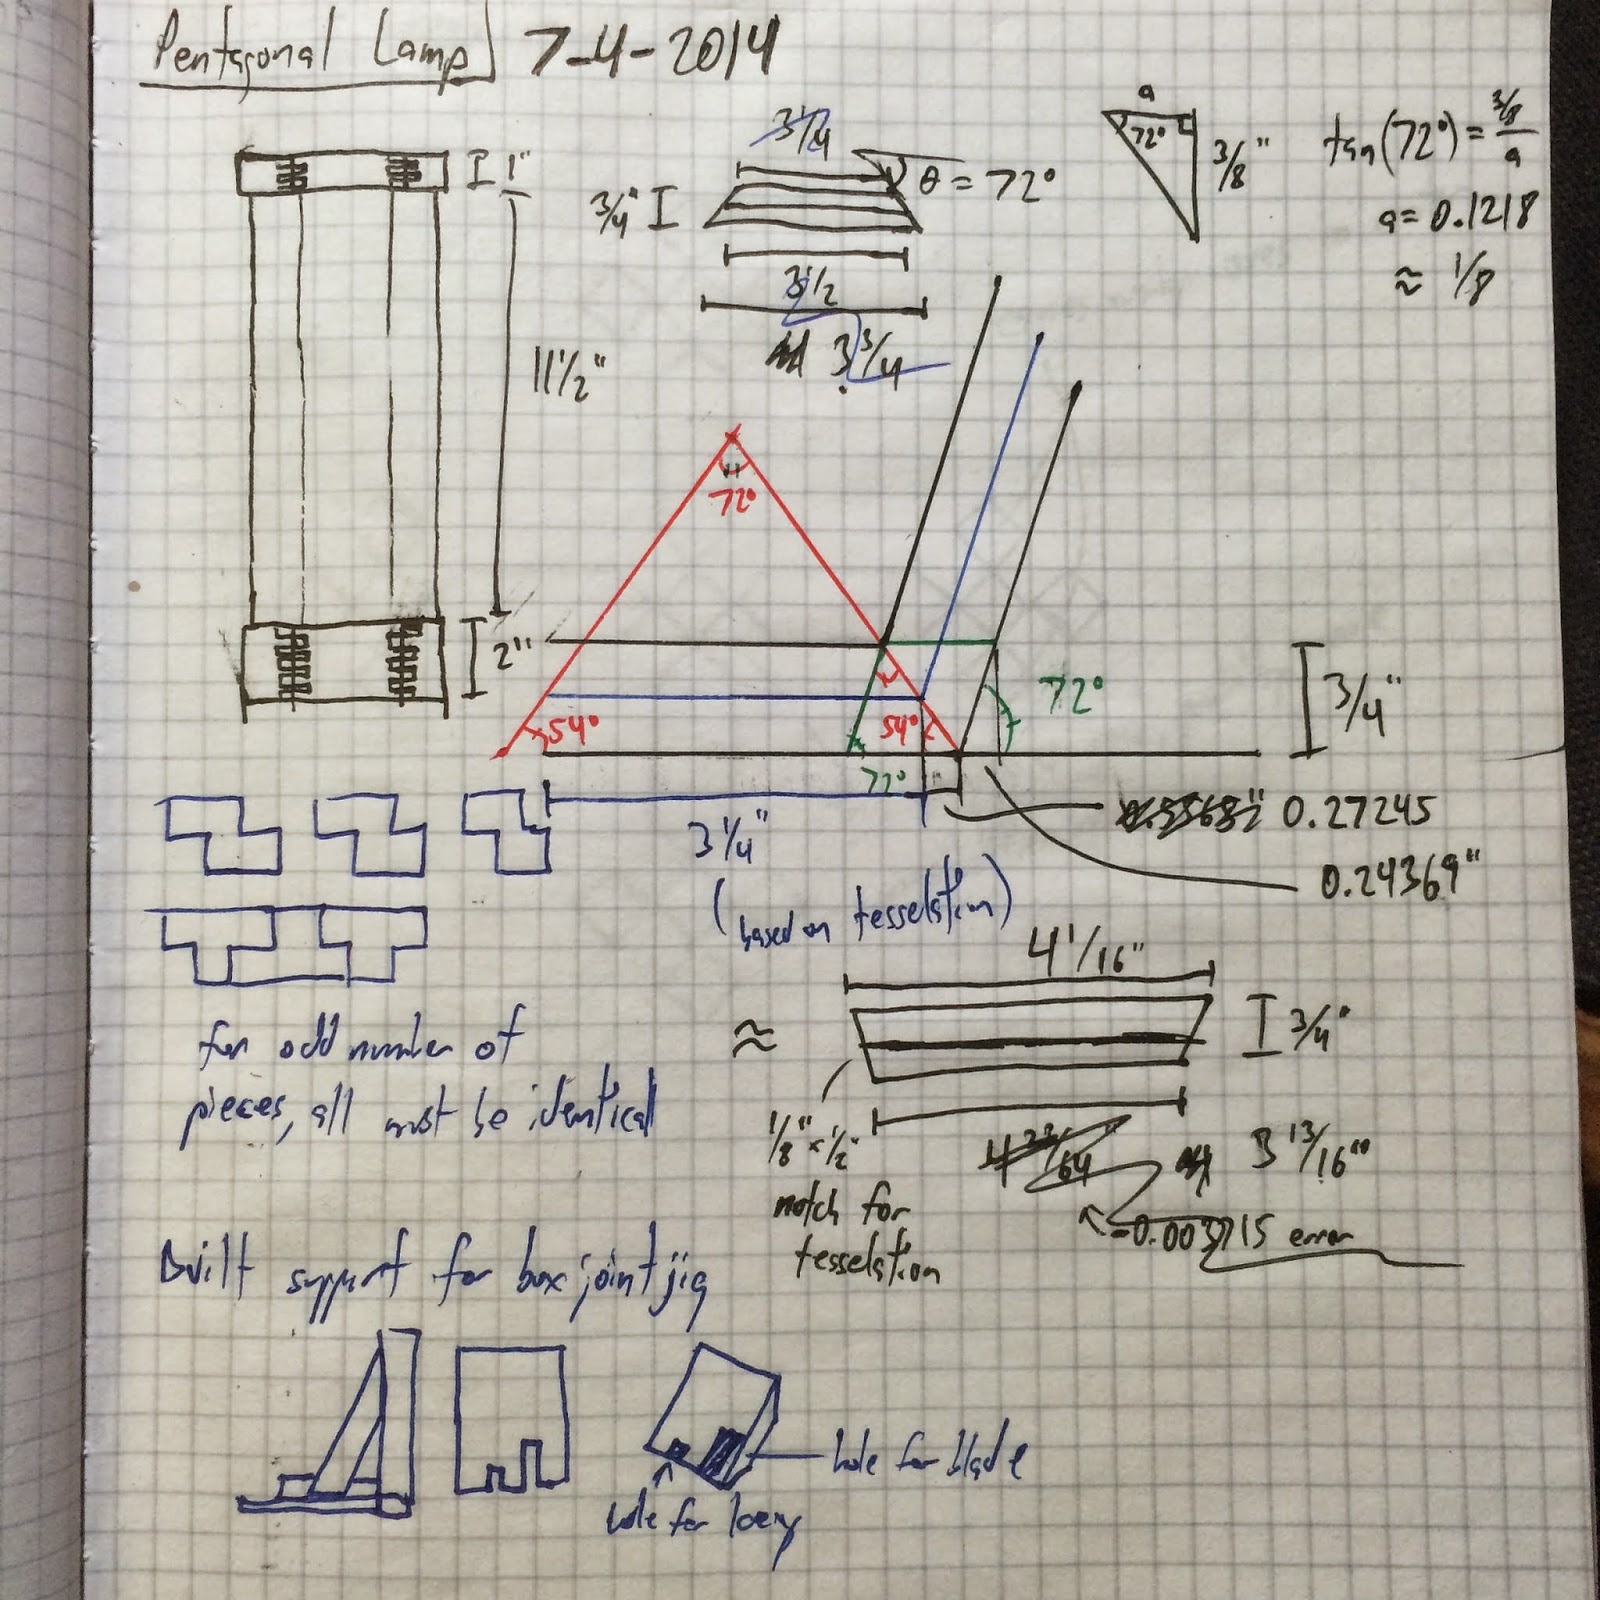
I worked out the rough dimensions and figured out the various weird angles and determined the teeth order on the joints (with an even number of sides, each side is typically a reflection of the previous side for teeth alignment, but for an odd number of sides, each side must be cut identically). I was able to make a homemade jig for cutting the box joints and it worked adequately, but making fine adjustments was difficult and setup was time consuming. The woodworking was put on hold and I put my work towards more origami designs until I could get my hands on a more reliable jig.
Square grid tessellations take considerably less time to fold than triangular grids. The number of simple devices for a square grid is small, but there are some interesting arrangements of squash folds and sinks. The below devices form the basis of my overall pattern designs.
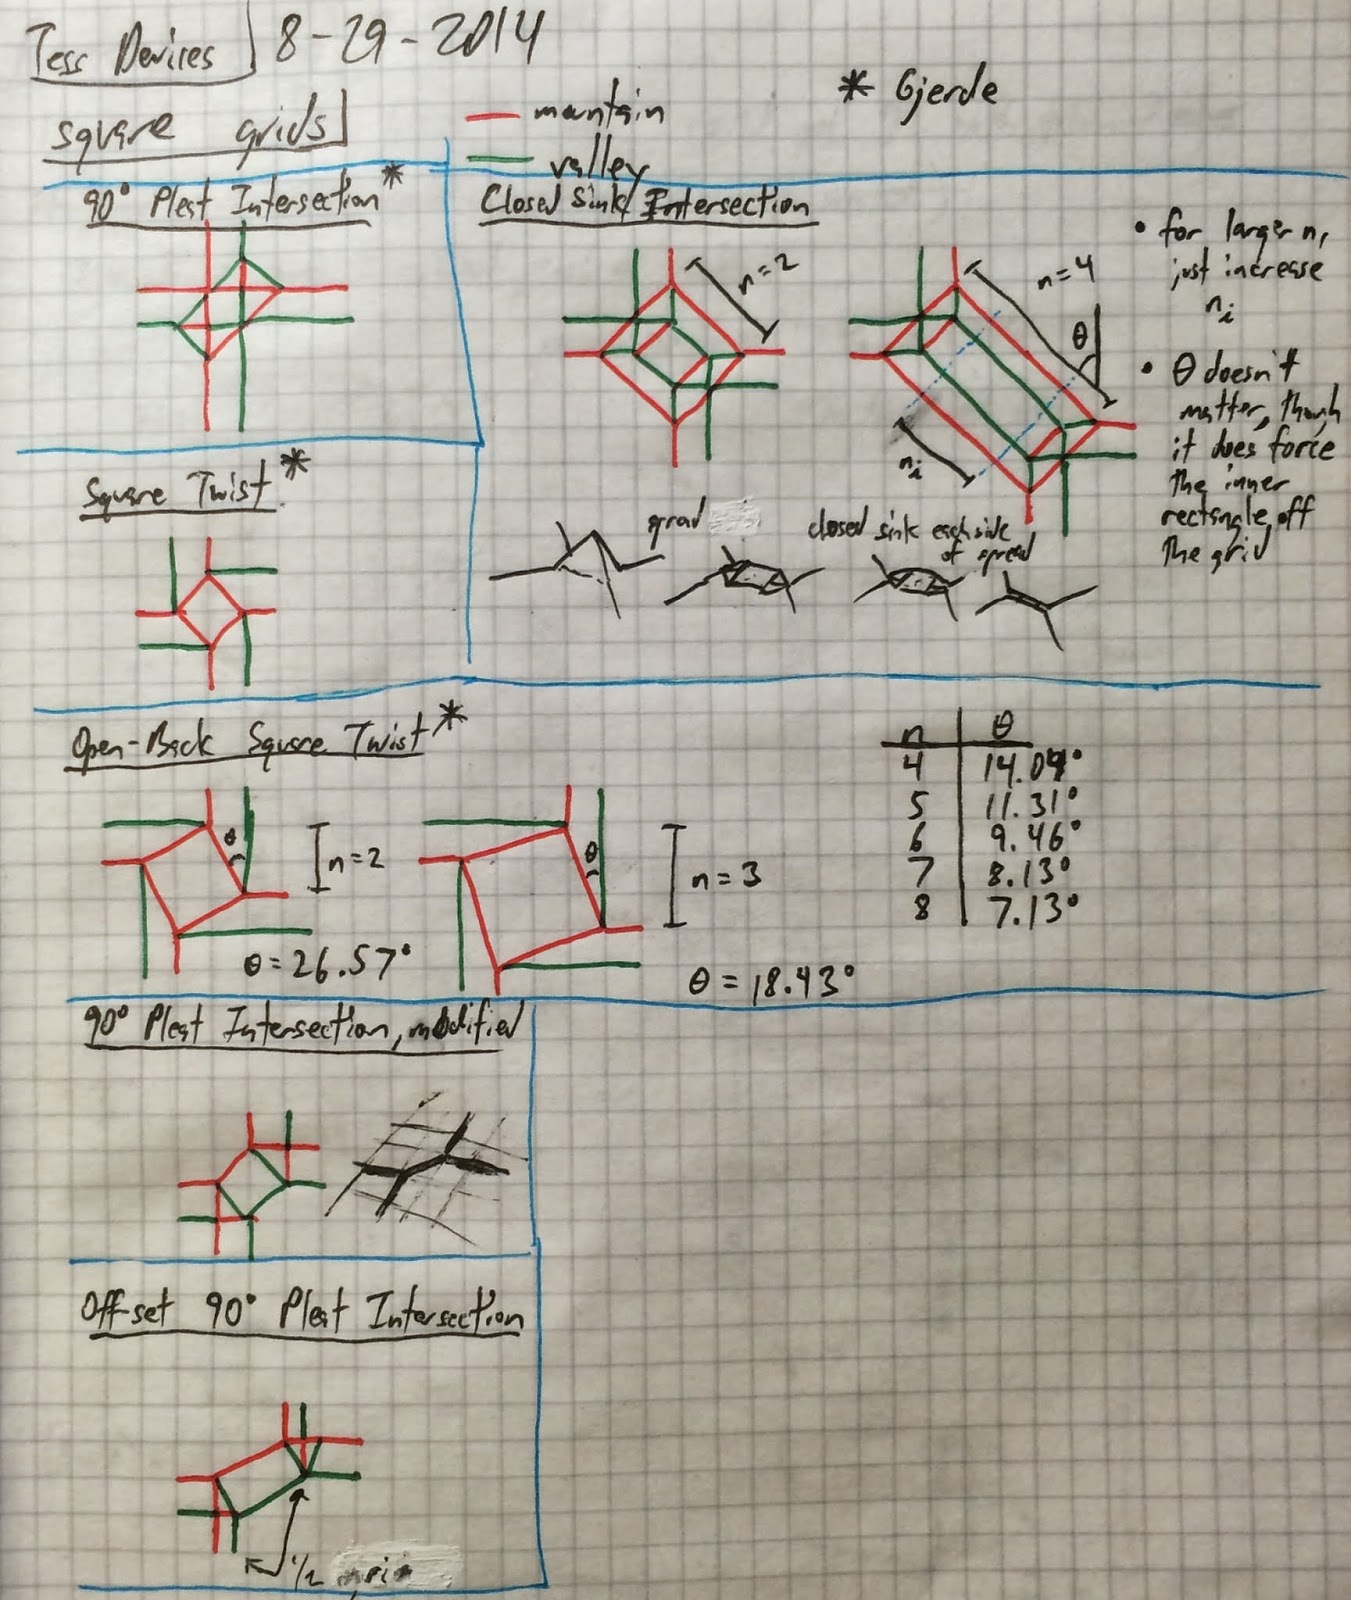
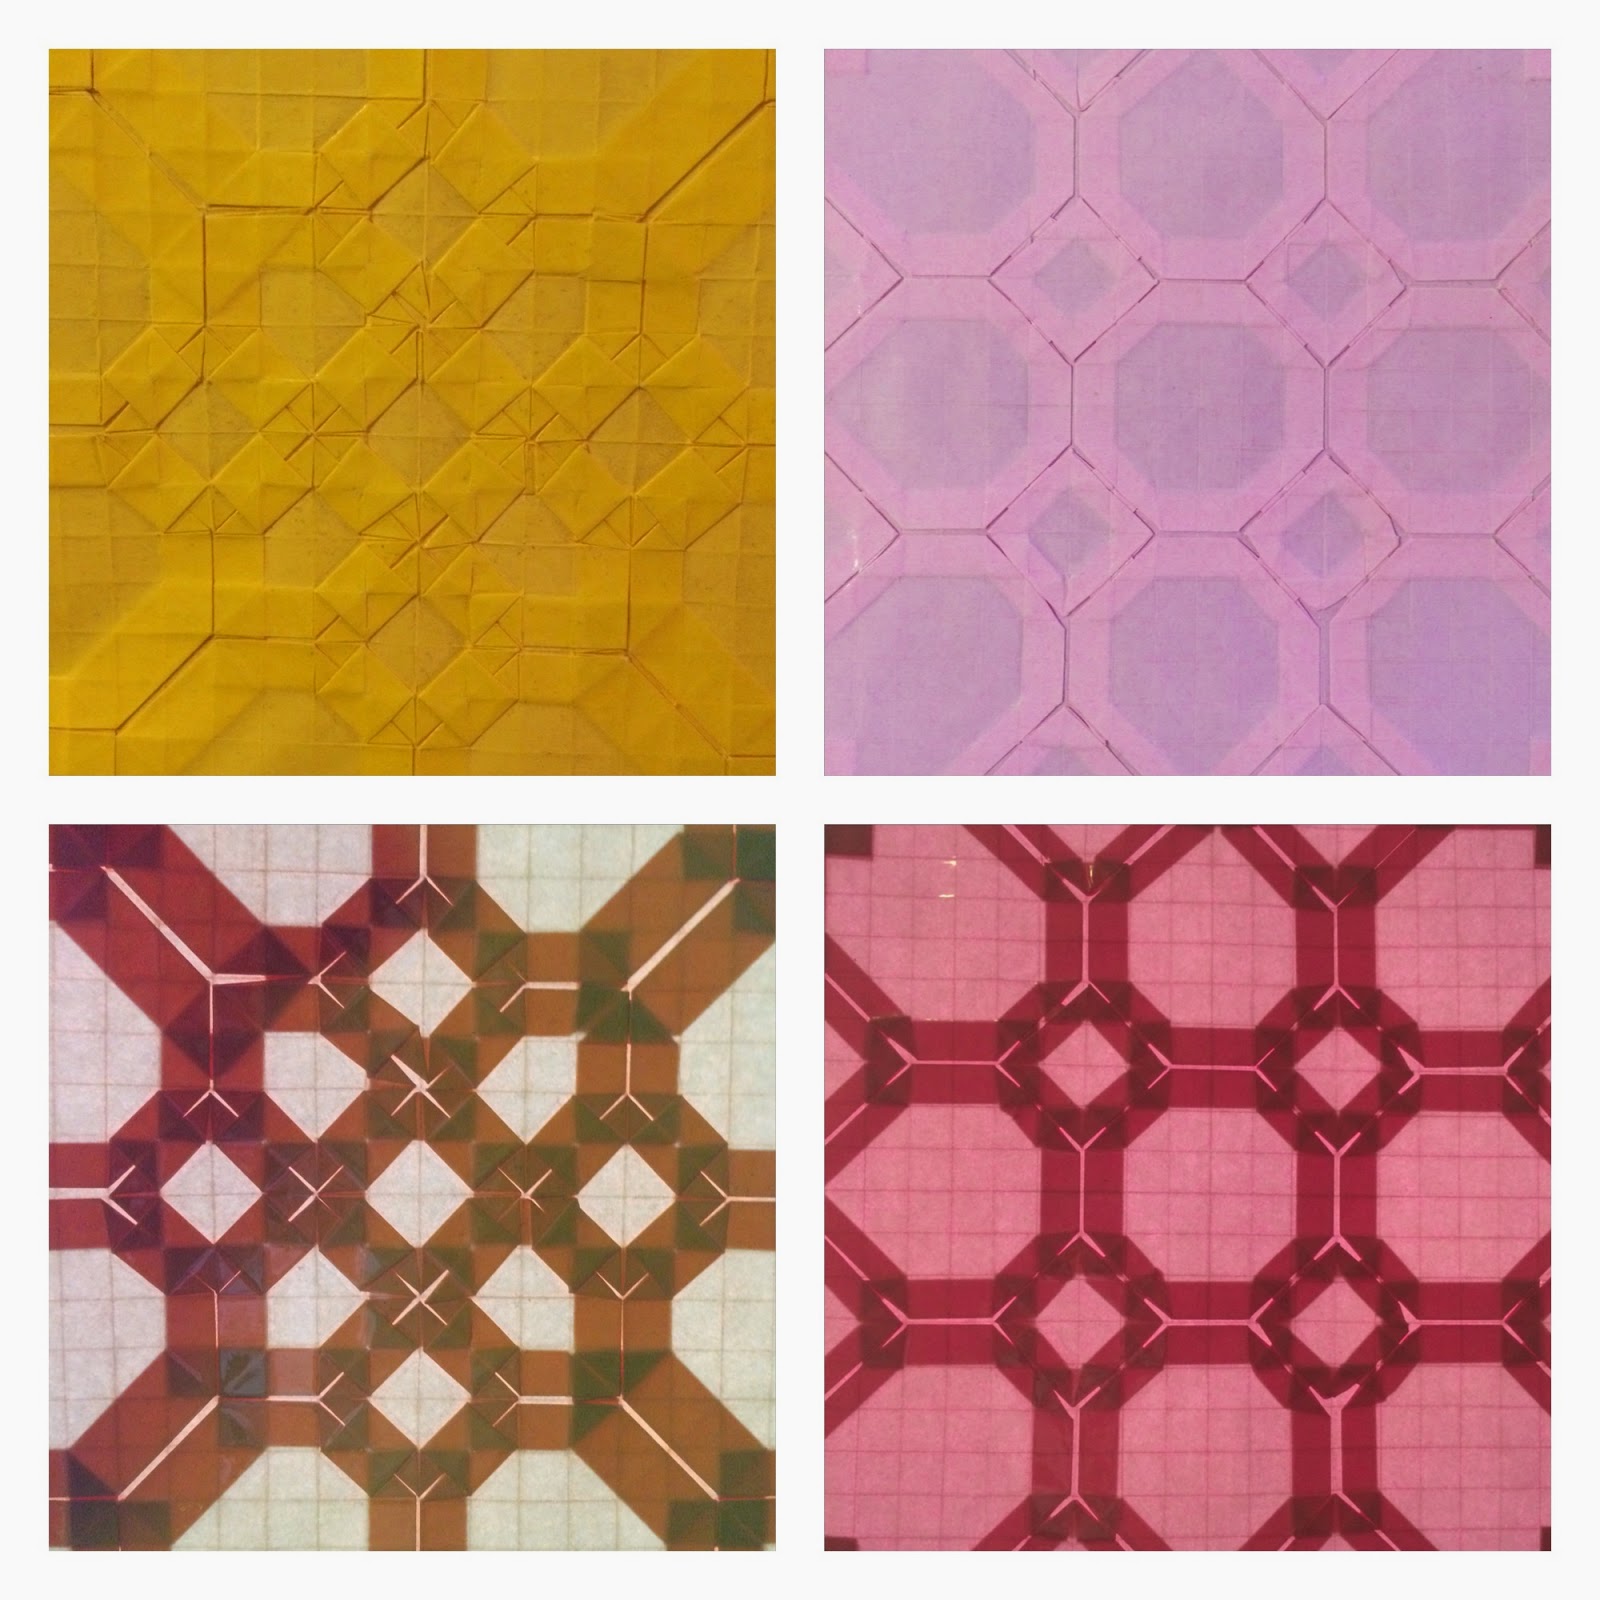
Two designs I used as the basis of the final design.
The width of the final design, measured by grid units, is evenly divisible by five for the pentagonal base (each face is eight grid units). Here are a couple gifs that show the full pattern (which I neglected to photograph before the the final glue-up).
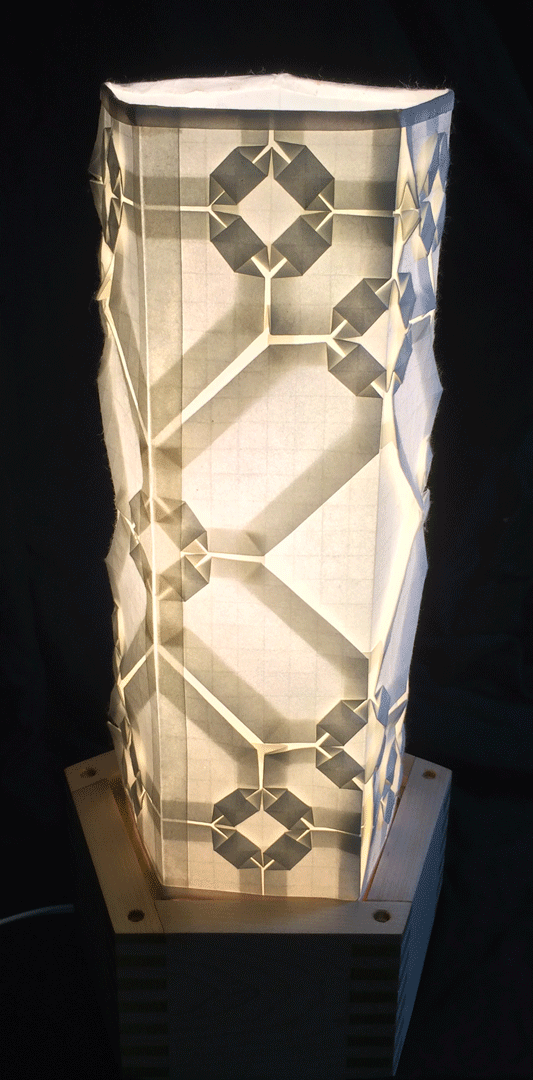

Once the design was folded and affixed to five panels of styrene, the form lacked stiffness because it has no natural tension to hold it's shape as cylindrical forms have. I bent some pentagons out of 18 gauge copper wire and glued them into the top and bottom borders, which solved the form retention problem.

The most soldering I've done in years.

Glued on borders with copper reinforcement.
Once the origami shade was complete, I shifted focus back to the woodworking. I purchased an Incra iBox jig and set it up to make normal box joints. After calibration, I started thinking about a modification to the fence to make the pentagonal box cuts with proper support for the stock. The modification was very simple - four 18 degree spacers glued to a 1/4" thick piece of MDF and fastened to the jig via some T-nuts, bolts, and knobs.
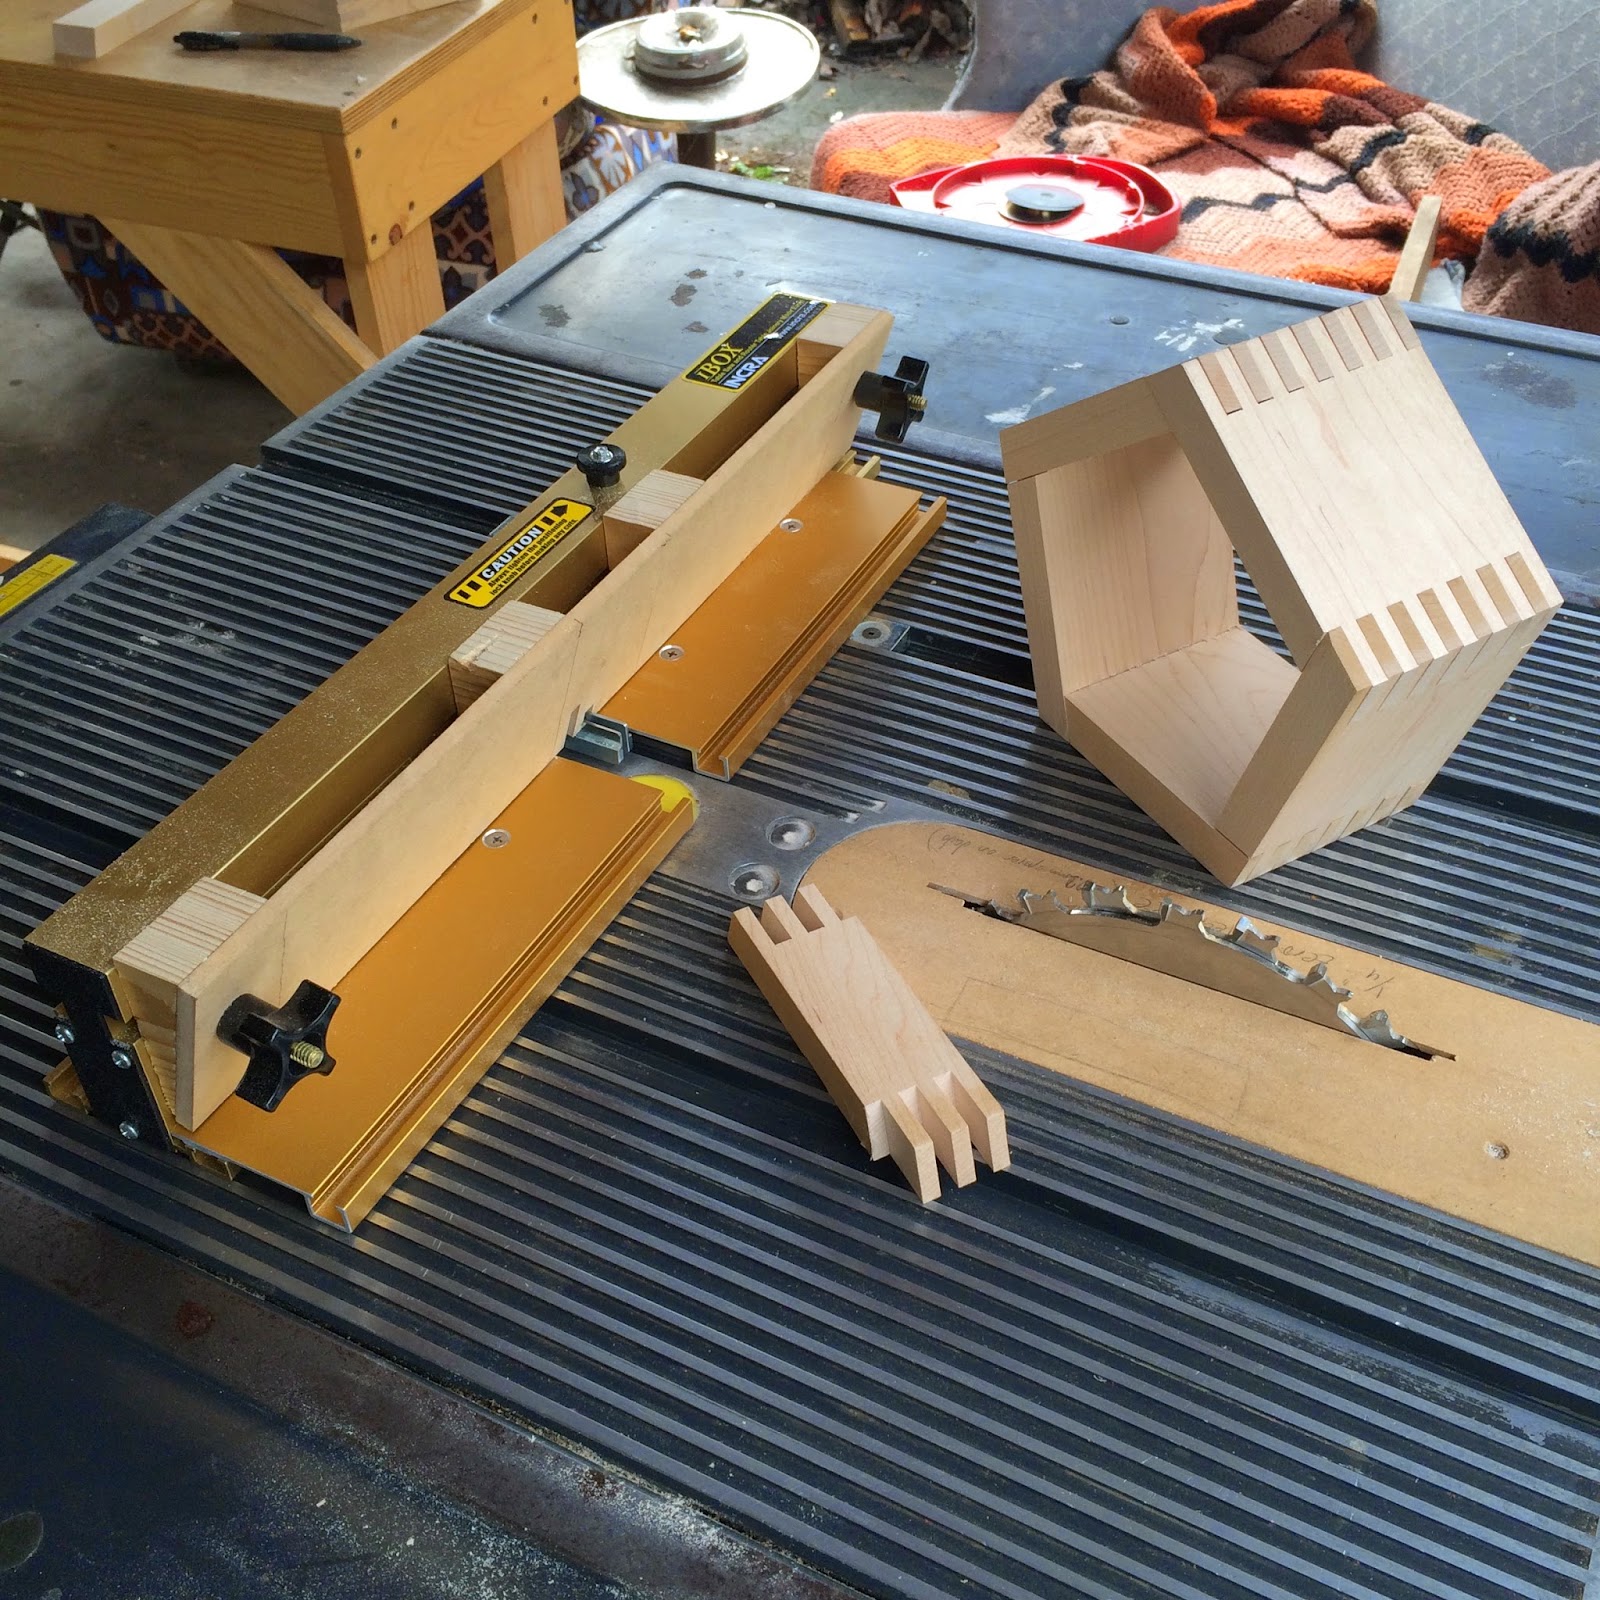
The modified jig.
There is a problem with this setup. Normally when cutting the teeth for a box joint, you need to flip the board around to cut the other teeth, but that would have the part leaning toward the jig at the top instead of away from the jig, which means the bottom edge (the one being cut) would not rest against the key. My solution was to cut the pieces to proper width (normally done as the last step) and then key from that new edge. Unfortunately, I was very slightly off, so when I went to assemble the box, the first and last pieces were off alignment by about a 1/8" (over 16 1/4" inches, so about a 1.5% error). The pieces to came together with no unseemly spaces during the dry fit; however, during the glue up, I used regular Titebond wood glue (which doesn't have a very long worktime) and was unable to force everything into perfect alignment. It was necessary to fill some of the gaps with wood filler, but it is only really noticeable when inspecting it very closely. Still thinking of a proper method for eliminating that error. Will post it to this blog when I figure it out (unless one of you has an idea, in which case please share!).
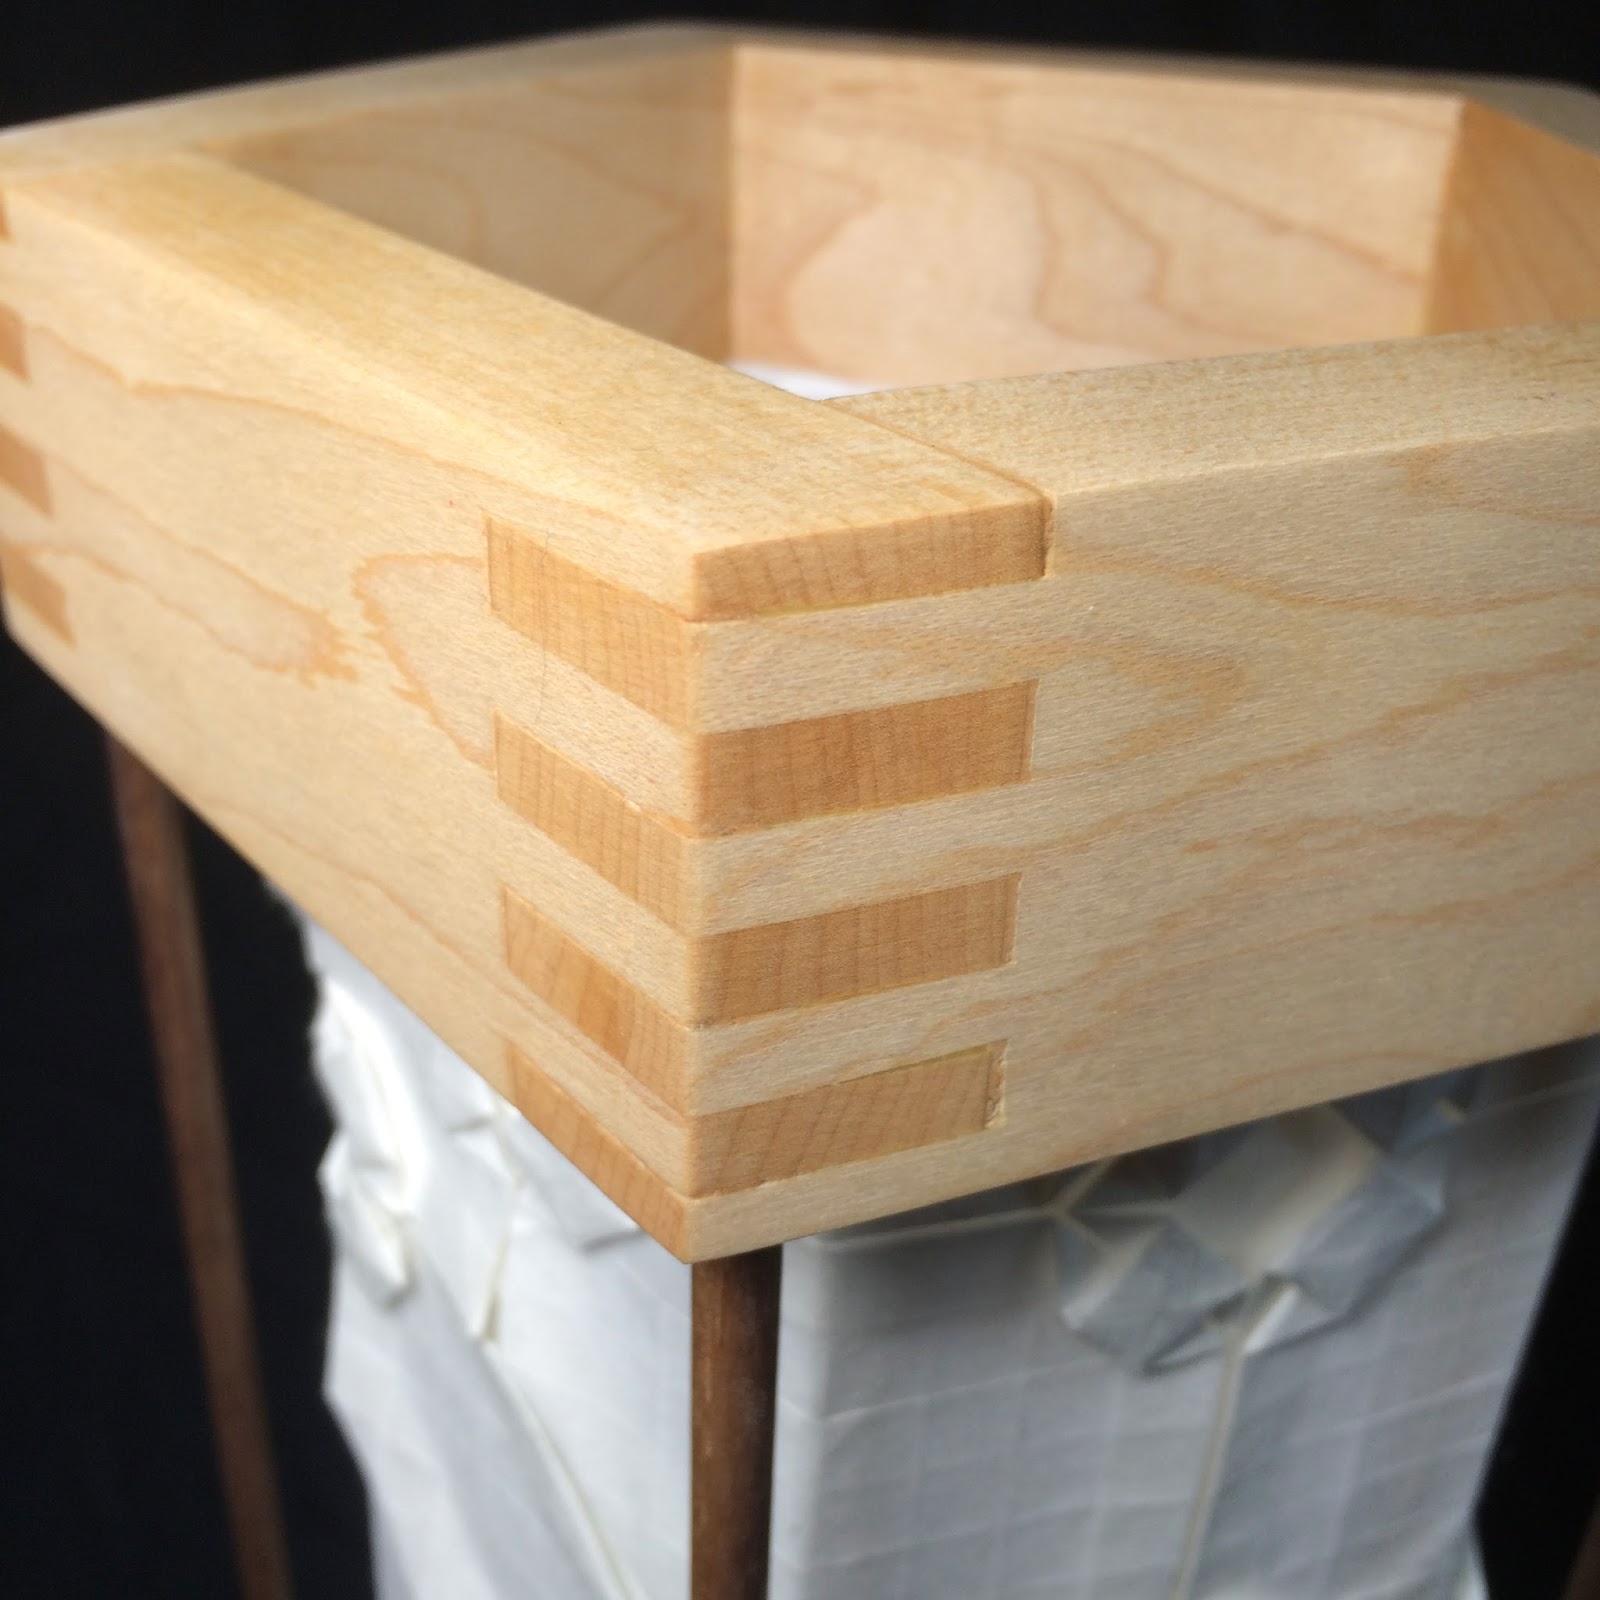
1.5% error!? *shakes fist at sky*
After assembly, I lightly planed the joints flush and then sanded everything by hand using 60 (sparingly), 100, 180, and 320 grit paper. For the finish, I used two coats of tung oil.

The hearts were put up during a party, but I left them on BECAUSE I LOVE HEARTS.
The finished product is something I enjoy quite a bit and will be leveraging this design into many other similar pieces. I do not plan on making exact duplicates of these wood lamps. Right now, there seems to be enough variety in the types of wood and the origami designs I can create so that each can be unique. If I run out of ideas, I reserve the right to make copies of course (which seems unlikely).